|
Home
| pfodApps/pfodDevices
| WebStringTemplates
| Java/J2EE
| Unix
| Torches
| Superannuation
|
| About
Us
|
|
|
pfodApp/pfodDesigner YouTube Videos |
by Matthew Ford 5th August 2022 (original
8th August 2019)
© Forward Computing and Control
Pty. Ltd. NSW Australia
All rights reserved.
These are a series of YouTube tutorial videos
produced by a pfodApp user. Email pfod.com.au via support if you need
help with any aspects of pfodApp / pfodDesigner
See Video
13 / Video 14 for a complete dwg designer
written in Arduino.
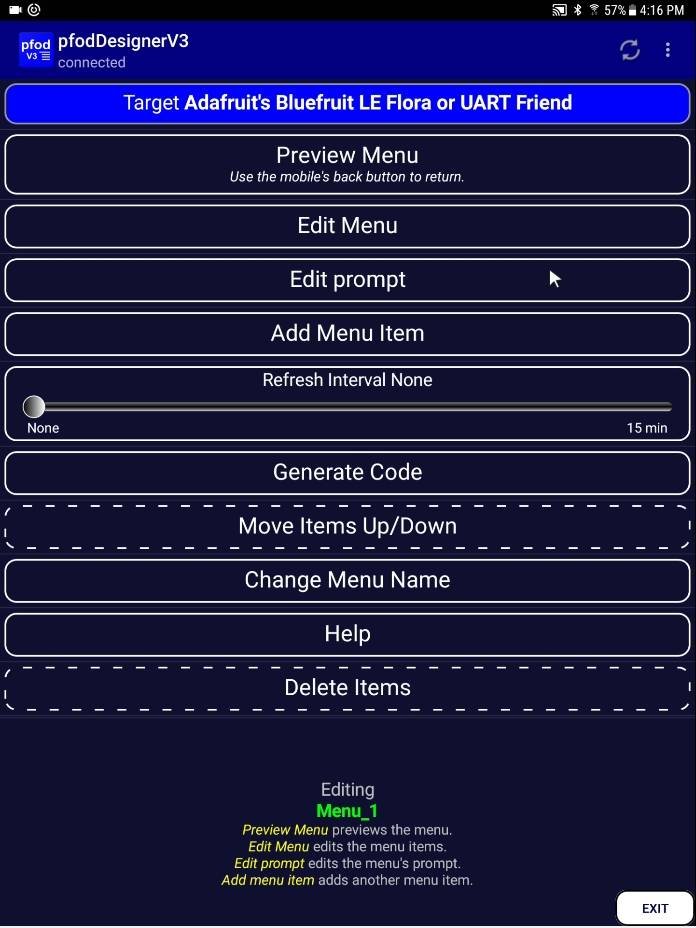
Video
1 – Introduction to pfodDesigner
Also see the
pfodDesigner
tutorials.
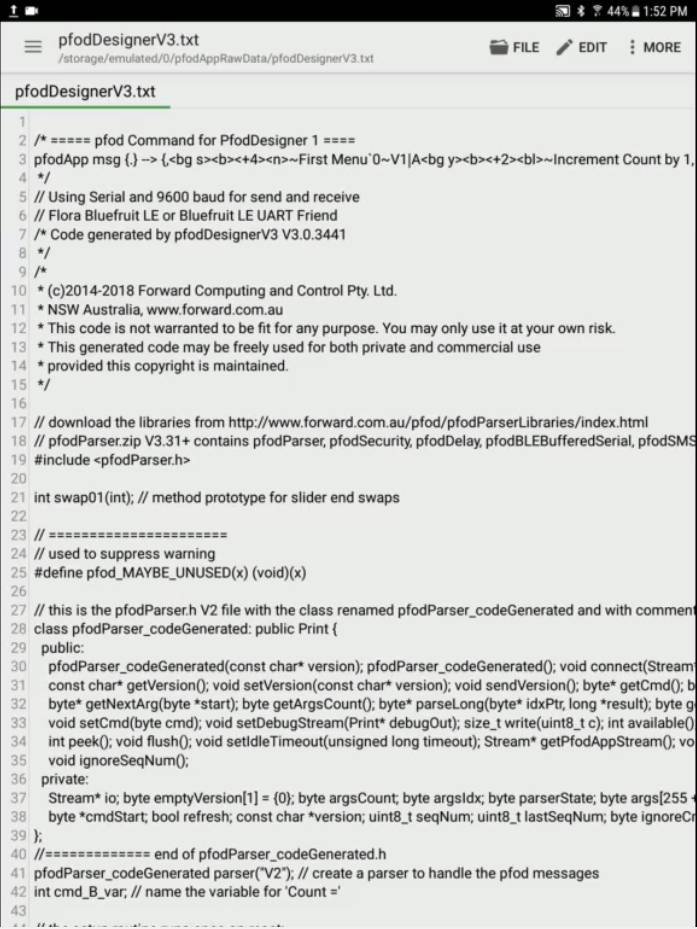
Video
2 – Transferring the pfodDesigner generated code to your
Arduino device
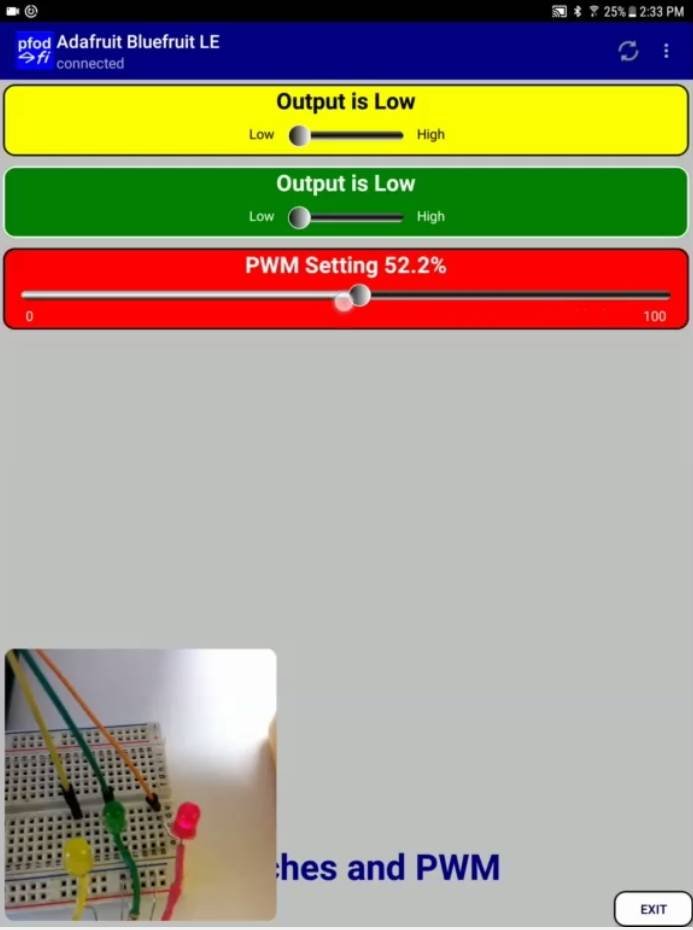
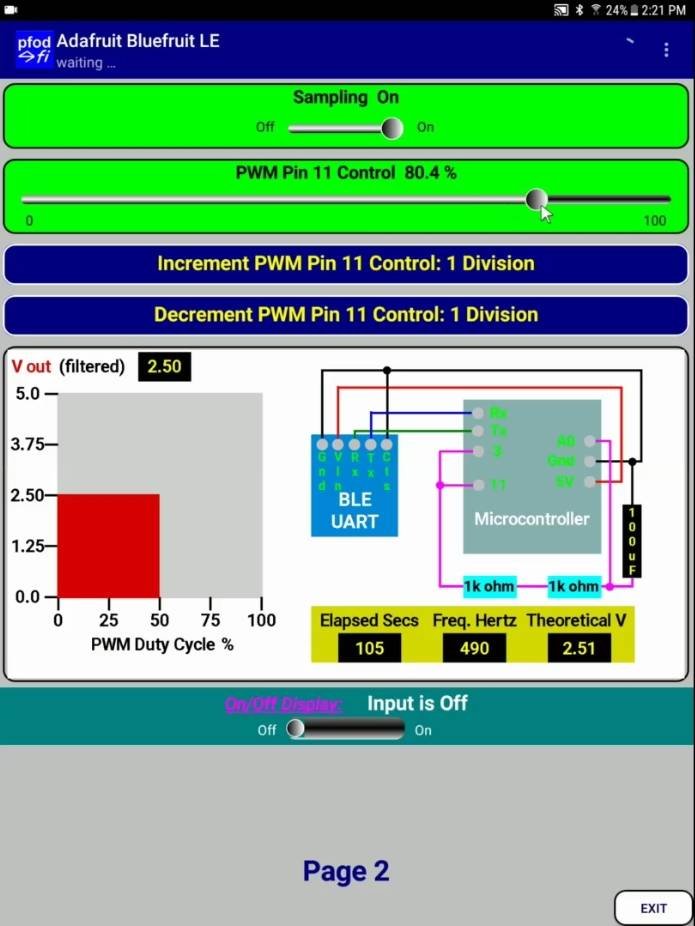
Video
3 – Controlling outputs, On/Off and PWM
Also see the
Pulsed
Outputs for Arduino using pfodApp using pfodDesigner tutorial
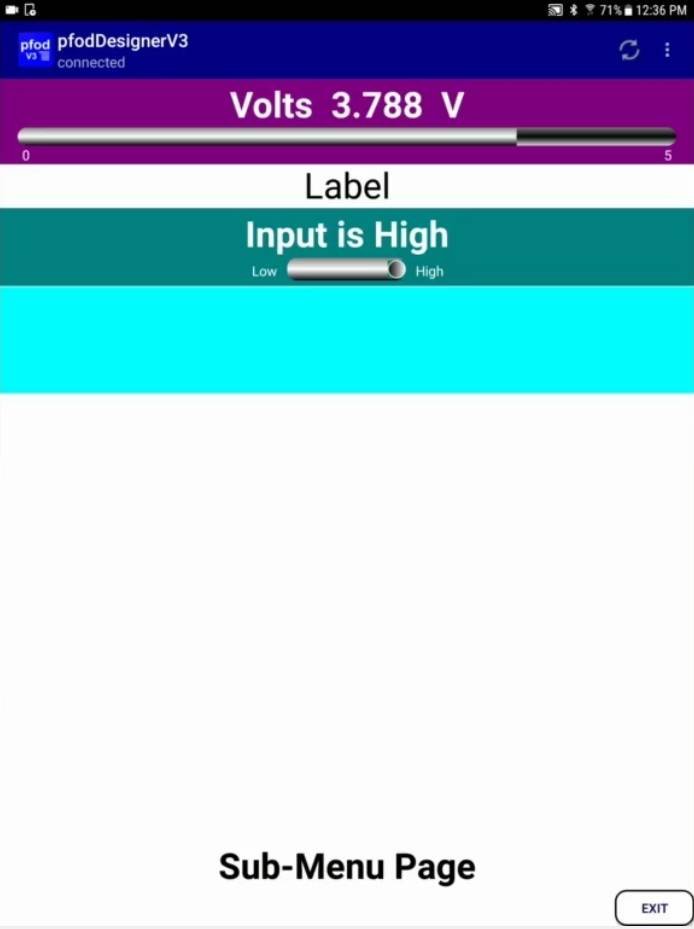
Video
4 – Sub-Menus, Labels and Reading Analog and Digital Inputs
Also see the How
to Display/Plot Arduino Data on Android tutorial
Video
5 – Formatting Tags, alarms and sample drawings (hand coded)
displaying data.
Drawings are very flexible and powerful but
require hand coding which this video does not cover.
See the
Custom Arduino
Controls for Android tutorial for the details.
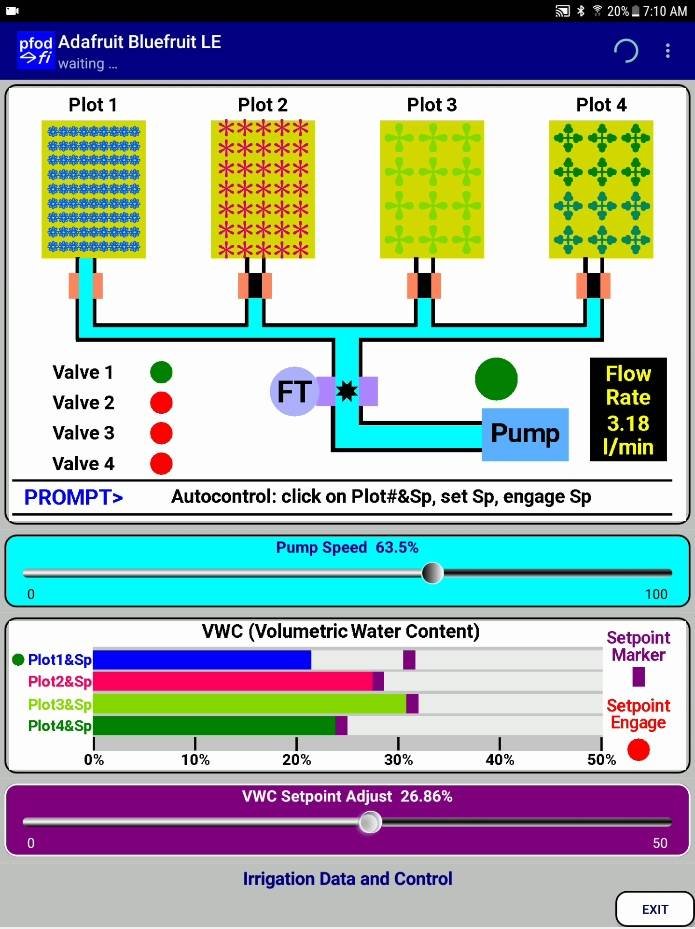
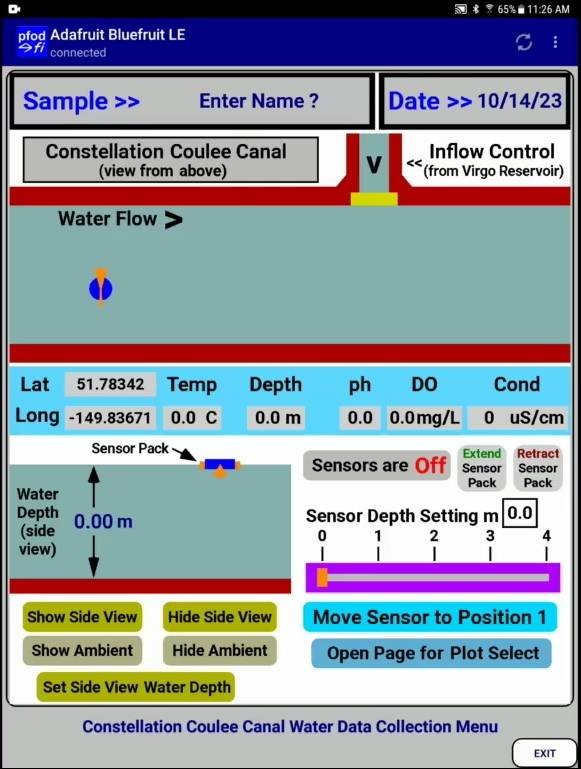
Video
6 – Illustration of making your drawings interactive using
touch zones (drawing buttons).
This is an example of an
irrigation controller which also mixes drawings and other menu items
on the same menu.
This video show some of the functionality you
can build into your interfaces.
It does not cover the coding
details. See the Custom
Arduino Controls for Android tutorial for how to add touch zones
and touch actions to your drawings.
Also see the Arduino
UNO/Mega Starter and the Arduino101
Starter sketches that make extensive use of drawing functions
including on-screen help and pan and zoom.
Video
7 – Introducing pushZero/popZero for moving and scaling drawing
items.
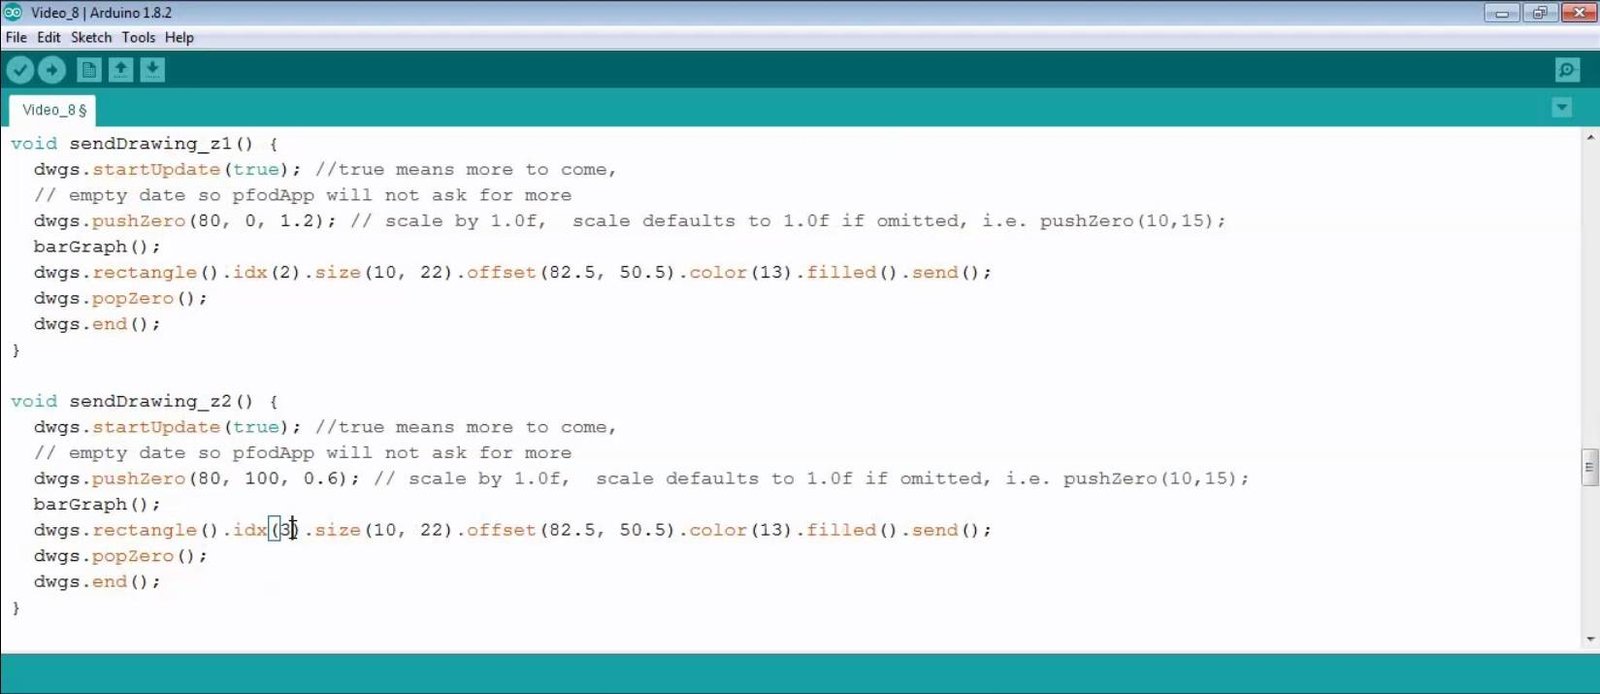
Video
8 – Indexing Drawing Items to Update them.
This video
shows how you can update parts of your drawing via a unique
index.
When you send a drawing update with an indexed drawing
item, the update completely replaces the existing item with the same
index.
Indexes can also be used to set the order items are drawn.
Higher indexed items are drawn over lower ones. Items with no index
are drawn in the order received.
Finally item indices need to be
unique. In this simple example, Brian allocates the indices by hand.
For more complex situations, the pfodParser library provides the
reserveIdx(n)
method that returns the first index of n
indices that are globally unique for this
sketch.
See pfodDwgControls
for more info on using indices and reserveIdx( )
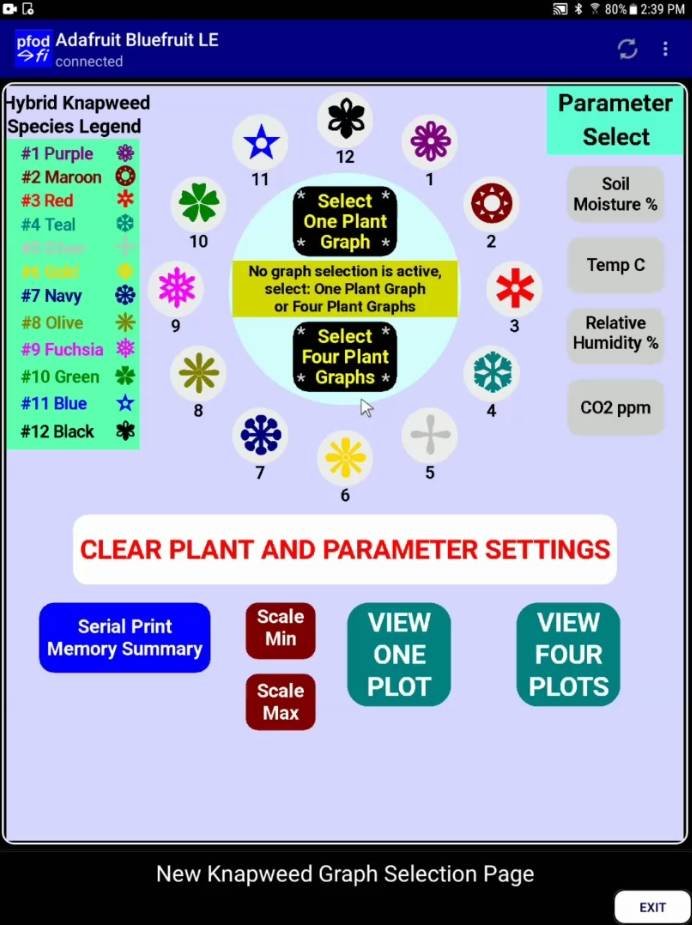
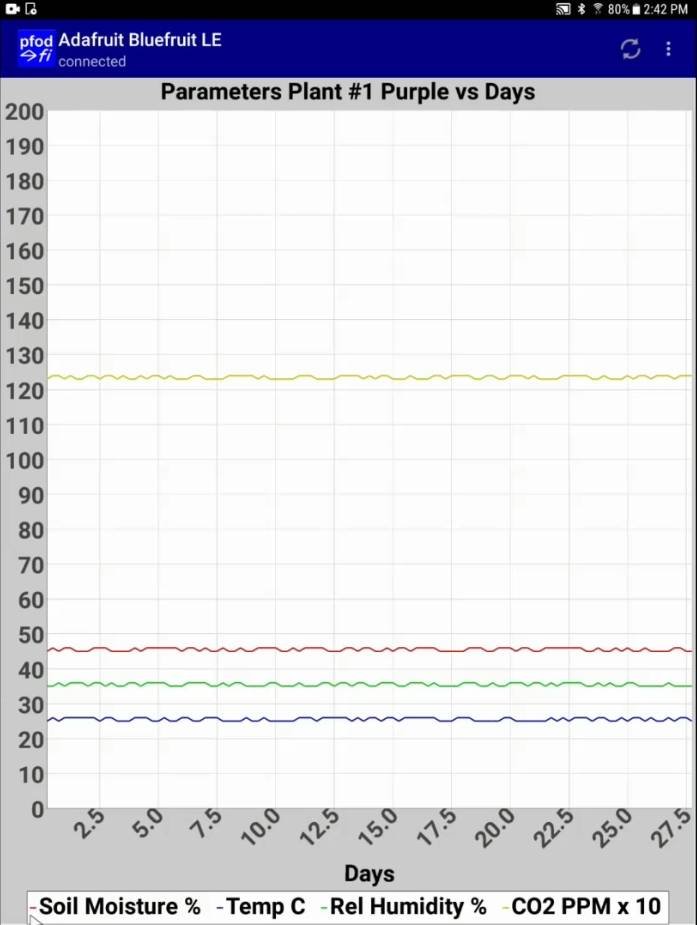
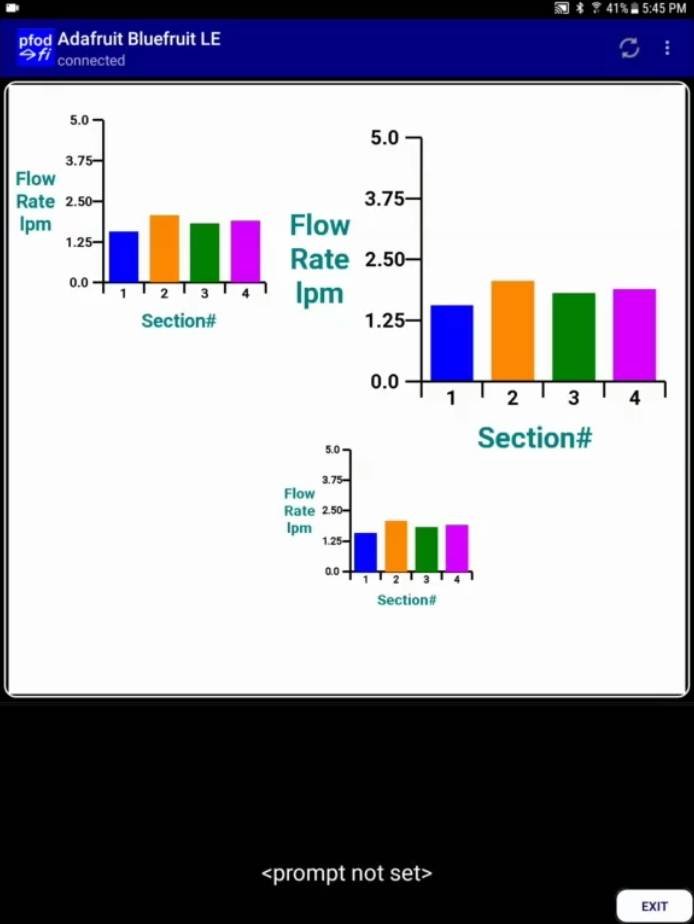
Video
9 – Plots and Unicode characters
This video illustrates
custom interface build by Brian that allows the user to select
multiple items to plot on a single plot or multiple plots on a single
screen.
pfodDesigner
can generate multi-plot examples.
This interface uses Unicode
characters to provide the symbols used for the buttons. See Using
Non-ASCII chars in Arduino
As with all these videos, the
screen display on your Android mobile is completely determined by the
commands you send.
Brian's code specifies the text, colours,
button outlines etc, as well as the size and location of the button's
touch zone and what action to take when a button is pressed.
See
pfodDwgControls
for more info.
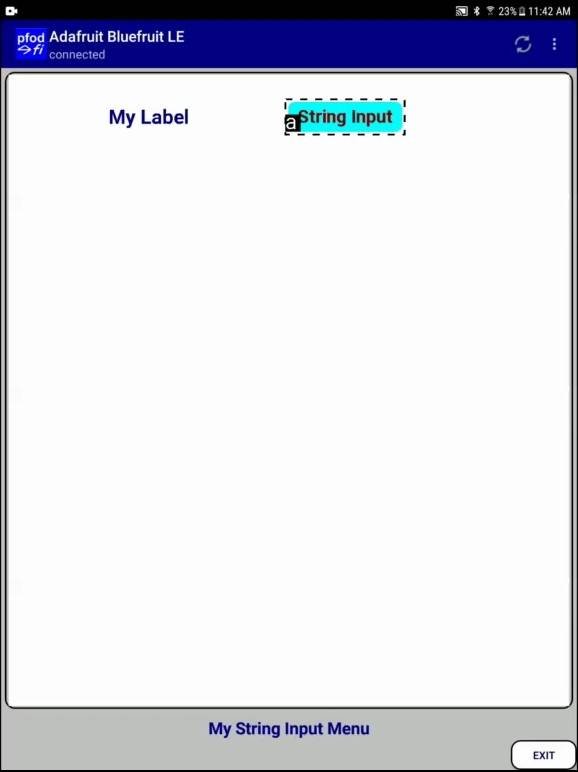
Video
11a – Coding a button to enter a String
This tutorial
creates a graphic in pfodDesigner. Modifies the generated code to add
a button which open a string input screen.
The tutorial also
covers turning on the log debug data setting to display the touch
zones (the dotted 'a' square above)
There is a companion Arduino
sketch which contains the code.
Video_11a_String_Input.ino
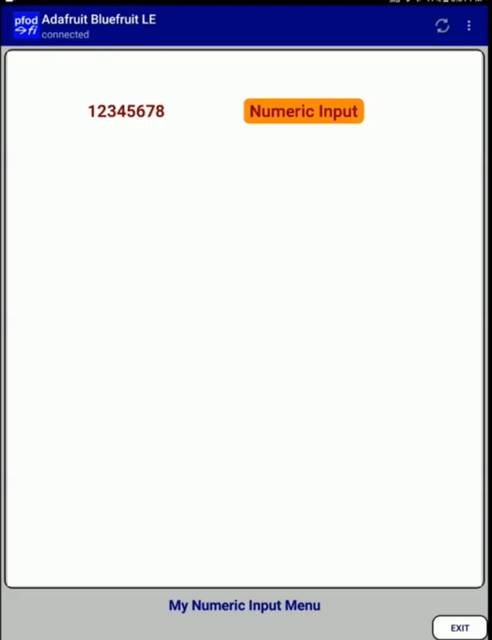
Video
11b – Numeric Input
This video uses a graphic button to
open a numeric input screen
and on return show the result on the
drawing.
There is a companion Arduino sketch which contains the
code.
Video_11b_Numeric_Input.ino
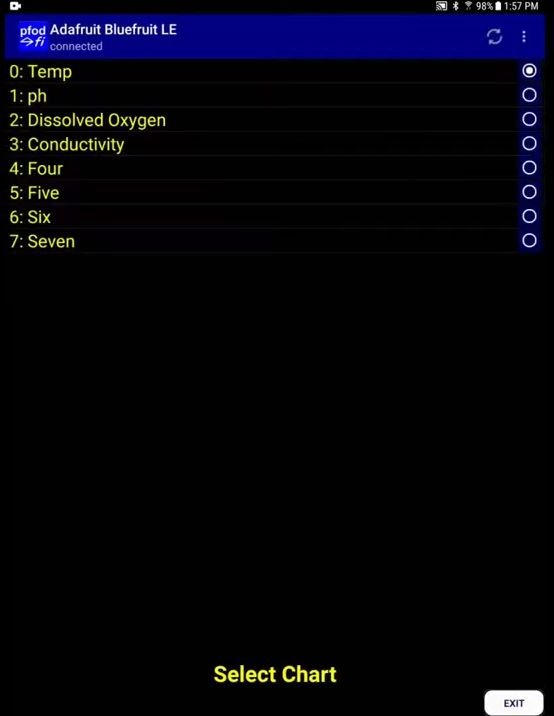
Video
11c – Single Selection Input
This video shows how to
code a single selection input screen.
There is a companion Arduino
sketch which contains the code.
Video_11c_Single_Selection_Input.ino
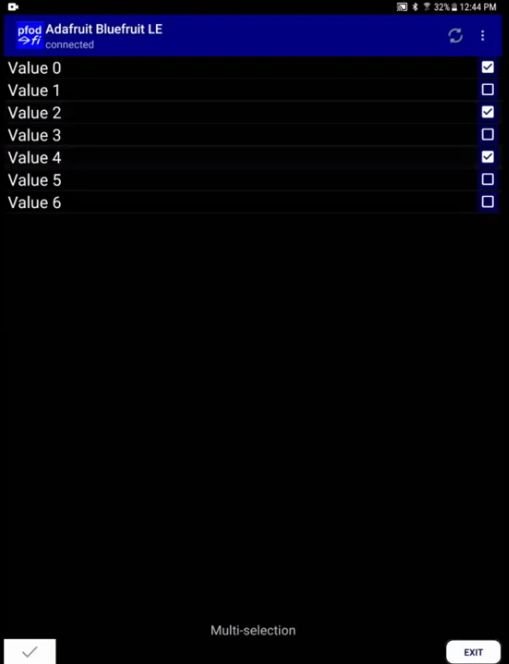
Video
11d– Multi-Selection Input
This video shows how to code
a multi-selection input screen.
There is a companion Arduino
sketch which contains the code.
Video_11d_Multi_Selection_Input.ino
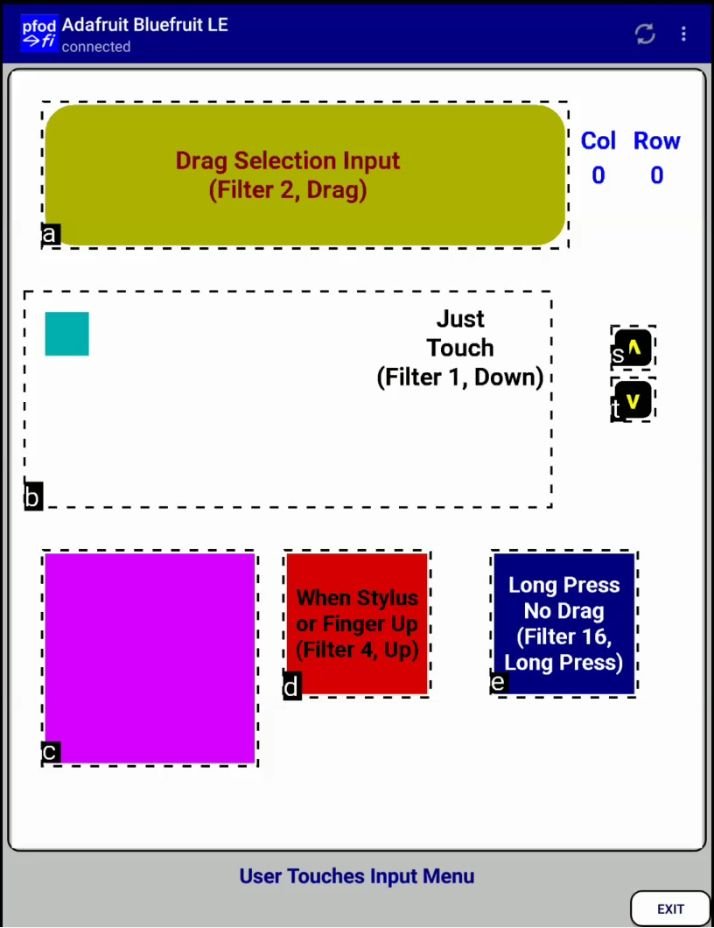
Video 12 –
Touch Zones
This video shows the use of touchZones and touch
filters
By default the dotted lines outlining the touchZones and
the touch cmd letters are not displayed
by pfodApp. The Log Debug
setting in the connections screen has been turned on for this
video.
There is a companion Arduino sketch which contains the
code.
Video_12_Filters_in_TouchZones.ino
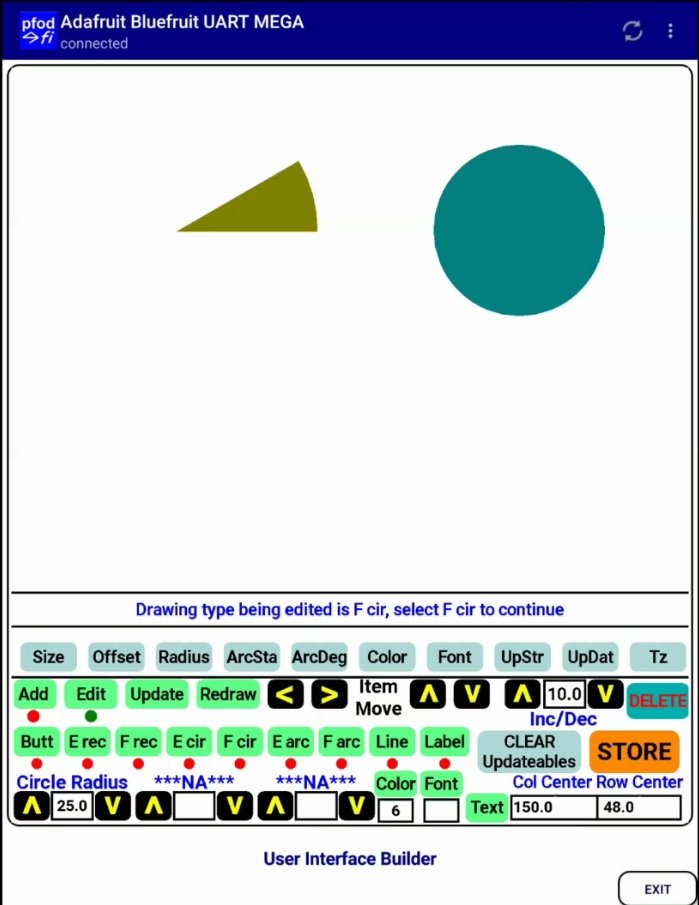
Video
13 – Dwg Designer
This video demonstrates Brian's Dwg
Designer Sketch.
The current sketch runs on a Mega2560+Adafruit
BLE Module + Adafruit_FRAM.
The next version will run on just a
Adafruit HUZZAH ESP8266.
The entire code for this display and
operation is in the sketch,
pfodApp just displays what is sent to
it. No Android programming required.
For a copy of the Ardunio
code contact Brian at gmail.com via userinterfacebuilder
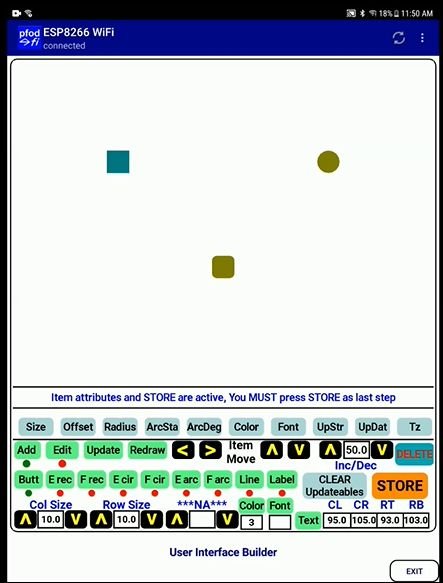
Video 14 –
Dwg Builder
This is another video demonstrates Brian's Dwg
Designer Sketch.
This sketch runs on a Adafruit HUZZAH
ESP8266.
The entire code for this display and operation is in the
sketch,
pfodApp just displays what is sent to it. No Android
programming required.
For a copy of the Ardunio code contact
Brian at gmail.com via userinterfacebuilder
AndroidTM is a trademark of Google Inc. For use of the Arduino name see http://arduino.cc/en/Main/FAQ
The General Purpose Android/Arduino Control App.
pfodDevice™ and pfodApp™ are trade marks of Forward Computing and Control Pty. Ltd.

Contact Forward Computing and Control by
©Copyright 1996-2020 Forward Computing and Control Pty. Ltd.
ACN 003 669 994