
|
Home
| pfodApps/pfodDevices
| WebStringTemplates
| Java/J2EE
| Unix
| Torches
| Superannuation
|
| About
Us
|

|
Android™ Controlled LED Driver using pfodApp™
|
by Matthew Ford 12th December 2010
© Forward
Computing and Control Pty. Ltd. NSW Australia
All rights reserved.
Part 1 of the tutorial introduced pfodDevices™ and the covered the specification of the operation discovery protocol. Part 2 of this tutorial covered the mobile phone pfodApp. This part of the tutorial covers the messages the Led Controller will send and receive as a pfodDevice. As a pfodDevice, the Led Controller will advertise its functionality to the pfodApp™ and let the user control the Led.
For the Led Controller this functionality will include turning the Led on and off, fading the led on and fading it off, increasing and decreasing the brightness and two sub-menus, one to set specific levels, High, Med, Low and another to display the current level setting and led current.
The first step is to design the messages the Led Controller is going to use to advertise it functions. The messages will be tested against the pfodApp™ to see how they will appear to the user, before coding them in the Led Controller.
Start by connection the Mobile Phone pfodApp™ to a terminal emulator on your PC (see Connecting the pfodApp™ To TeraTerm ). On connection the pfodApp™ automatically sends the getMainMenu message, {.}. The Led Controller pfodDevice™ should respond to this with its main menu of functionality. In this case we will advertise the following navigation commands, fade on, brighter and one sub-menu. A place holder command d is also sent so we can update this naviagation menu later. (Note: The PC connection in the pfodApp™ has 0 character timeout so the pfodApp™ will wait indefinitely for you to enter your response. However when connecting to the real pfodDevice, Led Controller needs to respond within its timeout settings. See the pfod specification for details)
Following the pfod
specification we assign command characters to these menu items, o
for on/off, f for
fade up/down, u
for up, d
for down, l
for Set Level sub-menu, a
for Data submenu.
{^Led
Control||m~menu|u~Brighter|d|f~Fade On}
Entering
this message into the terminal window sends it to the MobilePhone
pfodApp. (Hint: type the message into notepad first, get it correct
and then cut and paste it into the terminal window)
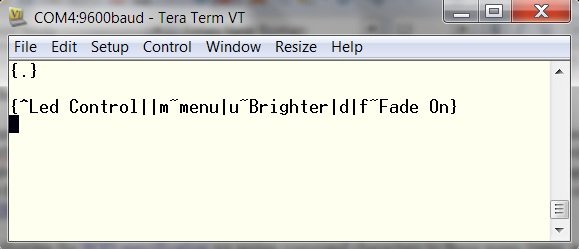
On
receiving this main menu, the pfodApp™ displays it.

The
pfod specification also allows for sending an optional menu title
which has been done here. If the menu title is not sent by the
pfodDevice, the pfodApp™ to should display something suitable.
The pfodApp™
shown in this tutorial will display the device name for the main menu
title.
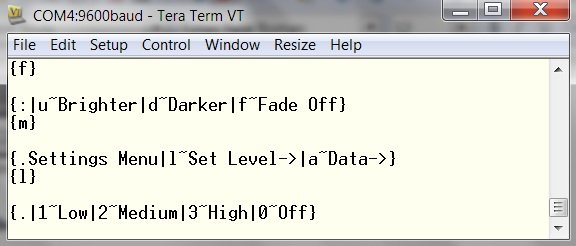
When the user sends the Fade On command, the pfodApp™ sends the message {f}. The Led Controller then should turn the Led on and send back a menu update that changes the Fade On display to Fade Off so the user can toggle the Led on and off using the same menu item. When the led is on, the Darker display text also needs to be included in the menu update so that the d command is enabled.
Following the pfod
specification for menu updates, the Led Controller needs to send back
display updates for the o and
f commands.
{:|u~Brighter|d~Darker|f~Fade
Off}
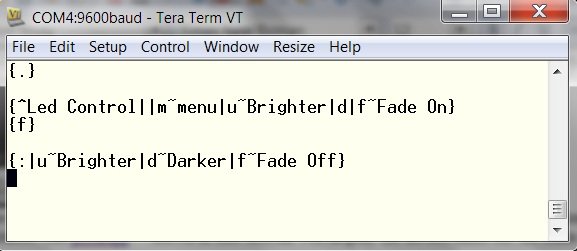
The
pfodApp™ now displays
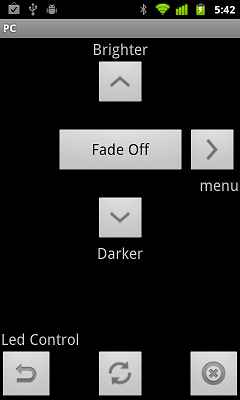
Sending the Brighter or Darker menu items send the messages {u} and {d} respectively to the Led Controller to increase or decrease the led brightness and update the menu depending on whether or not the maximum brightness has been reached or the led has been turned off.
The > menu item sends the message {m} and the Led Controller responds with the sub-menu.
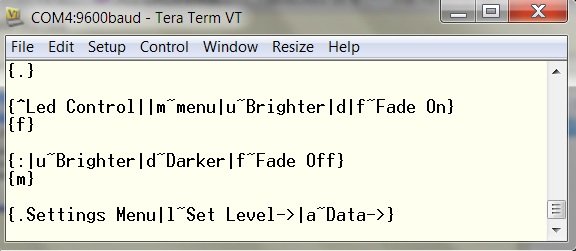
The pfodApp™ displays

This
menu has two further sub-menus, Set Level and Data
Choosing the Set
Level item displays sends the message {l} to
the pfodDevice™ which responds with the
menu
{.|1~Low|2~Medium|3~High|0~Off}
This
menu message did not include a menu prompt so the pfodApp™
did not display any prompt
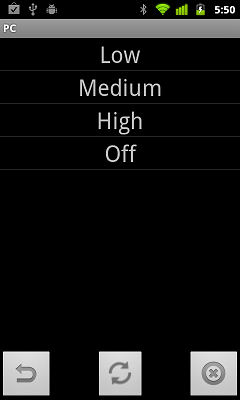
Each of these menu items send the associated command when selected. That is Low sends {1}, Medium sends {2}, High send {3} and Off sends {0}. The Led Controller sets the corresponding led level and since there is no update needed for this menu, the Led Controller just sends back an empty command, {}, to let the pfodApp™ know it has received and processed the command.
The
pfodApp™
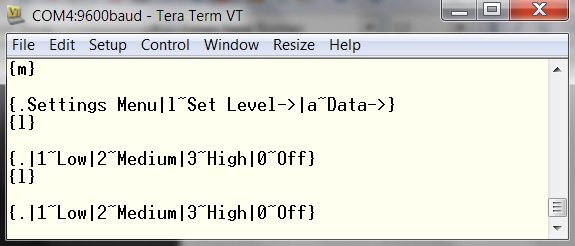
has a refresh button that can be used to re-request the current menu
![]()
In this case the pfodApp™ resends {l} to re-request the Set Level sub-menu and the Led Controller responds with the Set Level menu as before.
The pfodApp™
also has a Back button
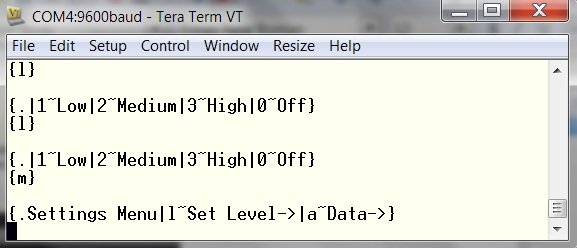
to go back to the previous menu.
![]()
The pfodApp™ does this by re-requesting the previous menu from the pfodDevice. In this case to choosing <- Back sends {m} to the Led Controller to re-request the previous menu.
Selecting the Data-> menu item sends {a} to the Led Controller which responds with the Data sub-menu. This menu contains two items Light Level and Led Current with associated commands v and i
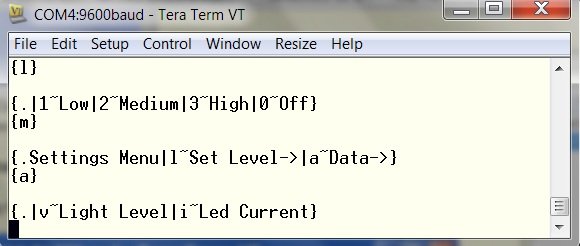
The
pfodApp™ displays
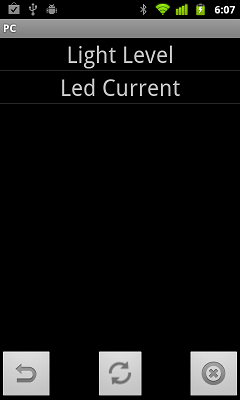
Selecting
Light Level sends
the message, {v},
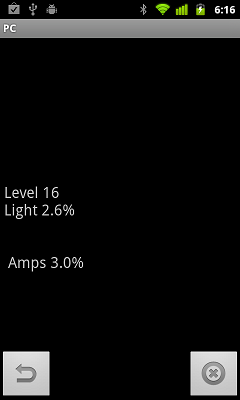
to the Led Controller. The Led Controller responds with a streaming
raw data message {=}
and
then sends the present value of the level and the % setpoint.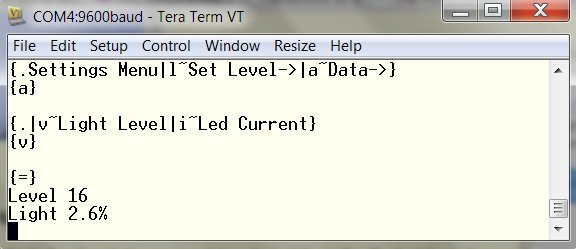
The
pfodApp™ displays a streaming raw data screen with the data
sent by the Led Controller.

The
Led Controller can continue to send as much raw data as it likes,
although the pfodApp™
may need to discard old data to make room for the newer data.
Going back to the Data menu, using the Back button, and selecting the Led Current menu item sends the message {i} and the Led Controller responds with the same streaming raw data message, {=}, but this time follows it with the % Led current reading.
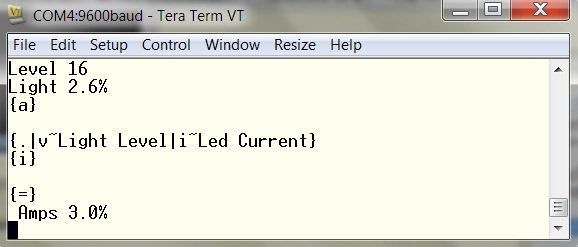
That completes the commands that will be supported by the Led Controller pfodDevice. The next section will cover the modifications needed to the existing Mobile Phone controlled Led Driver to make it a pfodDevice™ that provides these functions.
The General Purpose Android/Arduino Control App.
pfodDevice™ and pfodApp™ are trade marks of Forward Computing and Control Pty. Ltd.
Contact Forward Computing and Control by
©Copyright 1996-2020 Forward Computing and Control Pty. Ltd.
ACN 003 669 994